5 minutes
Testing a NextJS-TypeScript app with Jest
Recently, I was working on a web app made with React and NextJS using TypeScript, and along the way, I wanted to write tests for pages and components of this app. I used Jest before, so I wanted to use it in this project as well. But, I ended up spending more time on configuring tests than I planned.
During the process of setting it all up, I asked a friend, who is also working on an app with NextJS and TypeScript, for help. His immediate response was: “I managed to set it all up but I spent hours finding the proper solution". That is when I decided to write the blog post you are reading. I hope it will save someone precious time by showing the full example of Jest testing (Enzyme as well) with NextJS and TypeScript.
The entire source of the sample app with configuration and a few tests is available on GitHub.
Setup
Below are the main config files of the working app.
The package.json file with all the dependencies required for testing should look like this:
{
  "name": "next-typescript-jest",
  "description": "Example of testing React with Jest within Next.js and TypeScript project.",
  "version": "1.0.0",
  "main": "index.js",
  "license": "MIT",
  "author": "Harun Djulic",
  "scripts": {
    "test": "NODE_ENV=test jest",
    "dev": "next",
    "build": "next build",
    "start": "next start"
  },
  "dependencies": {
    "next": "^5.0.0",
    "react": "^16.2.0",
    "react-dom": "^16.2.0"
  },
  "devDependencies": {
    "@types/jest": "^22.2.2",
    "@types/next": "^2.4.8",
    "@types/react": "^16.0.41",
    "@types/react-dom": "^16.0.4",
    "@zeit/next-typescript": "^0.0.11",
    "enzyme": "^3.3.0",
    "enzyme-adapter-react-16": "^1.1.1",
    "jest": "^22.4.3",
    "react-addons-test-utils": "^15.6.2",
    "react-test-renderer": "^16.2.0",
    "ts-jest": "^22.4.2",
    "typescript": "^2.7.2"
  }
}
Next, we need to create a few config files that wire NextJS, TypeScript, and Jest together. All config files are located at the root of the app.
First up is next.config.js. It is pretty simple:
const withTypescript = require('@zeit/next-typescript');
module.exports = withTypescript();
Then add tsconfig.json which configures how TypeScript is compiled to js:
{
    "compileOnSave": false,
    "compilerOptions": {
        "target": "esnext",
        "module": "esnext",
        "jsx": "preserve",
        "allowJs": true,
        "moduleResolution": "node",
        "allowSyntheticDefaultImports": true,
        "noUnusedLocals": true,
        "noUnusedParameters": true,
        "removeComments": false,
        "preserveConstEnums": true,
        "sourceMap": true,
        "skipLibCheck": true,
        "baseUrl": ".",
        "typeRoots": [
            "./node_modules/@types"
        ],
        "lib": [
            "dom",
            "es2015",
            "es2016"
        ]
    },
    "exclude": [
        "node_modules",
        "**/*.spec.ts",
        "**/*.spec.tsx",
        "**/*.test.ts",
        "**/*.test.tsx",
    ]
}
Next up are two files for Jest. First of which is jest.config.js. As you can see on the bottom of the file I have set collectCoverage to true so we get a nice overview of test coverage of the app after running the tests:
const TEST_REGEX = '(/__tests__/.*|(\\.|/)(test|spec))\\.(jsx?|js?|tsx?|ts?)$';

module.exports = {
    setupFiles: ['<rootDir>/jest.setup.js'],
    globals: {
        'ts-jest': {
            'useBabelrc': true
        }
    },
    testRegex: TEST_REGEX,
    transform: {
        '^.+\\.tsx?$': 'ts-jest'
    },
    testPathIgnorePatterns: [
        '<rootDir>/.next/', '<rootDir>/node_modules/'
    ],
    moduleFileExtensions: [
        'ts', 'tsx', 'js', 'jsx'
    ],
    collectCoverage: true
};
Second file for Jest is a simple jest.setup.js in which we setup Enzyme:
const Enzyme = require('enzyme');
const Adapter = require('enzyme-adapter-react-16');

Enzyme.configure({adapter: new Adapter()});
And finally the .babelrc:
{
    "env": {
        "development": {
            "presets": [
                "next/babel"
            ]
        },
        "production": {
            "presets": [
                "next/babel"
            ]
        },
        "test": {
            "presets": [
                [
                    "next/babel",
                    {
                        "preset-env": {
                            "modules": "commonjs"
                        }
                    }
                ]
            ]
        }
    }
}
Adding components and tests
Below you can see how the files and folders of this sample app are organized. Each module of the app has its’ dedicated tests folder (see cars folder) and each standalone component has its’ own test (see NiceCheckbox folder).
You can organize your project any way you feel comfortable but the important thing is to name your test files with test or spec as part of the name. That is how we configured Jest to recognize our test files in jest.config.js (on the very first line). Again, you can have a naming convention that suits you when it comes to naming these files, just remember to specify it in jest.config.js.

Now we will have a look at an example of a test file. This is how Overview.test.tsx file looks like:
/* eslint-env jest */
import React from 'react';
import {shallow} from 'enzyme';

import Overview from './../Overview';

const __CARS__ = [
    {
        make: 'Volvo',
        model: 'C30',
        engine: 'T5',
        year: 2018,
        mileage: 123,
        equipment: ['Leather', 'Seat heating', 'City Safety']
    }, {
        make: 'Volvo',
        model: 'XC60',
        engine: 'D5',
        year: 2018,
        mileage: 456,
        equipment: ['Leather', 'Seat heating', 'City Safety']
    }, {
        make: 'Volvo',
        model: 'XC90',
        engine: 'T6',
        year: 2018,
        mileage: 789,
        equipment: ['Leather', 'Seat heating', 'City Safety']
    }
];

describe('Cars overview', () => {
    it('renders the h1 title', () => {
        const overview = shallow(<Overview cars={[]}/>);
        expect(overview.find('h1').text()).toEqual('Cars Overview');
    });

    it('renders empty cars list when no cars are provided', () => {
        const overview = shallow(<Overview cars={[]}/>);
        expect(overview.find('.Cars__List').children().find('p').text()).toEqual('No cars');
    });

    it('renders cars list with 3 items when 3 cars are provided', () => {
        const overview = shallow(<Overview cars={__CARS__}/>);
        expect(overview.find('.Cars__List').children().find('ul').children()).toHaveLength(3);
    });

    it('renders cars list with the expected item on third place', () => {
        const overview = shallow(<Overview cars={__CARS__}/>);
        expect(overview.find('.Cars__List').children().find('ul').childAt(2).text()).toEqual('Volvo XC90');
    });

    it('renders car detail after clicking on an item in cars list', () => {
        const overview = shallow(<Overview cars={__CARS__}/>);
        overview
            .find('.Cars__List')
            .children()
            .find('ul')
            .childAt(1)
            .simulate('click', {preventDefault() {}});

        expect(overview.update().find('.CarInfo').find('h2').text()).toEqual('Volvo XC60');
    });
});
Running the tests
In order to run the tests you simply run:
yarn testThis will run the tests once and show you the results.
If you wish to run tests after any of the files changed and saved you can add a –watchAll flag:
yarn test --watchAllNow tests will be rerun each time any of the source or test files are saved.
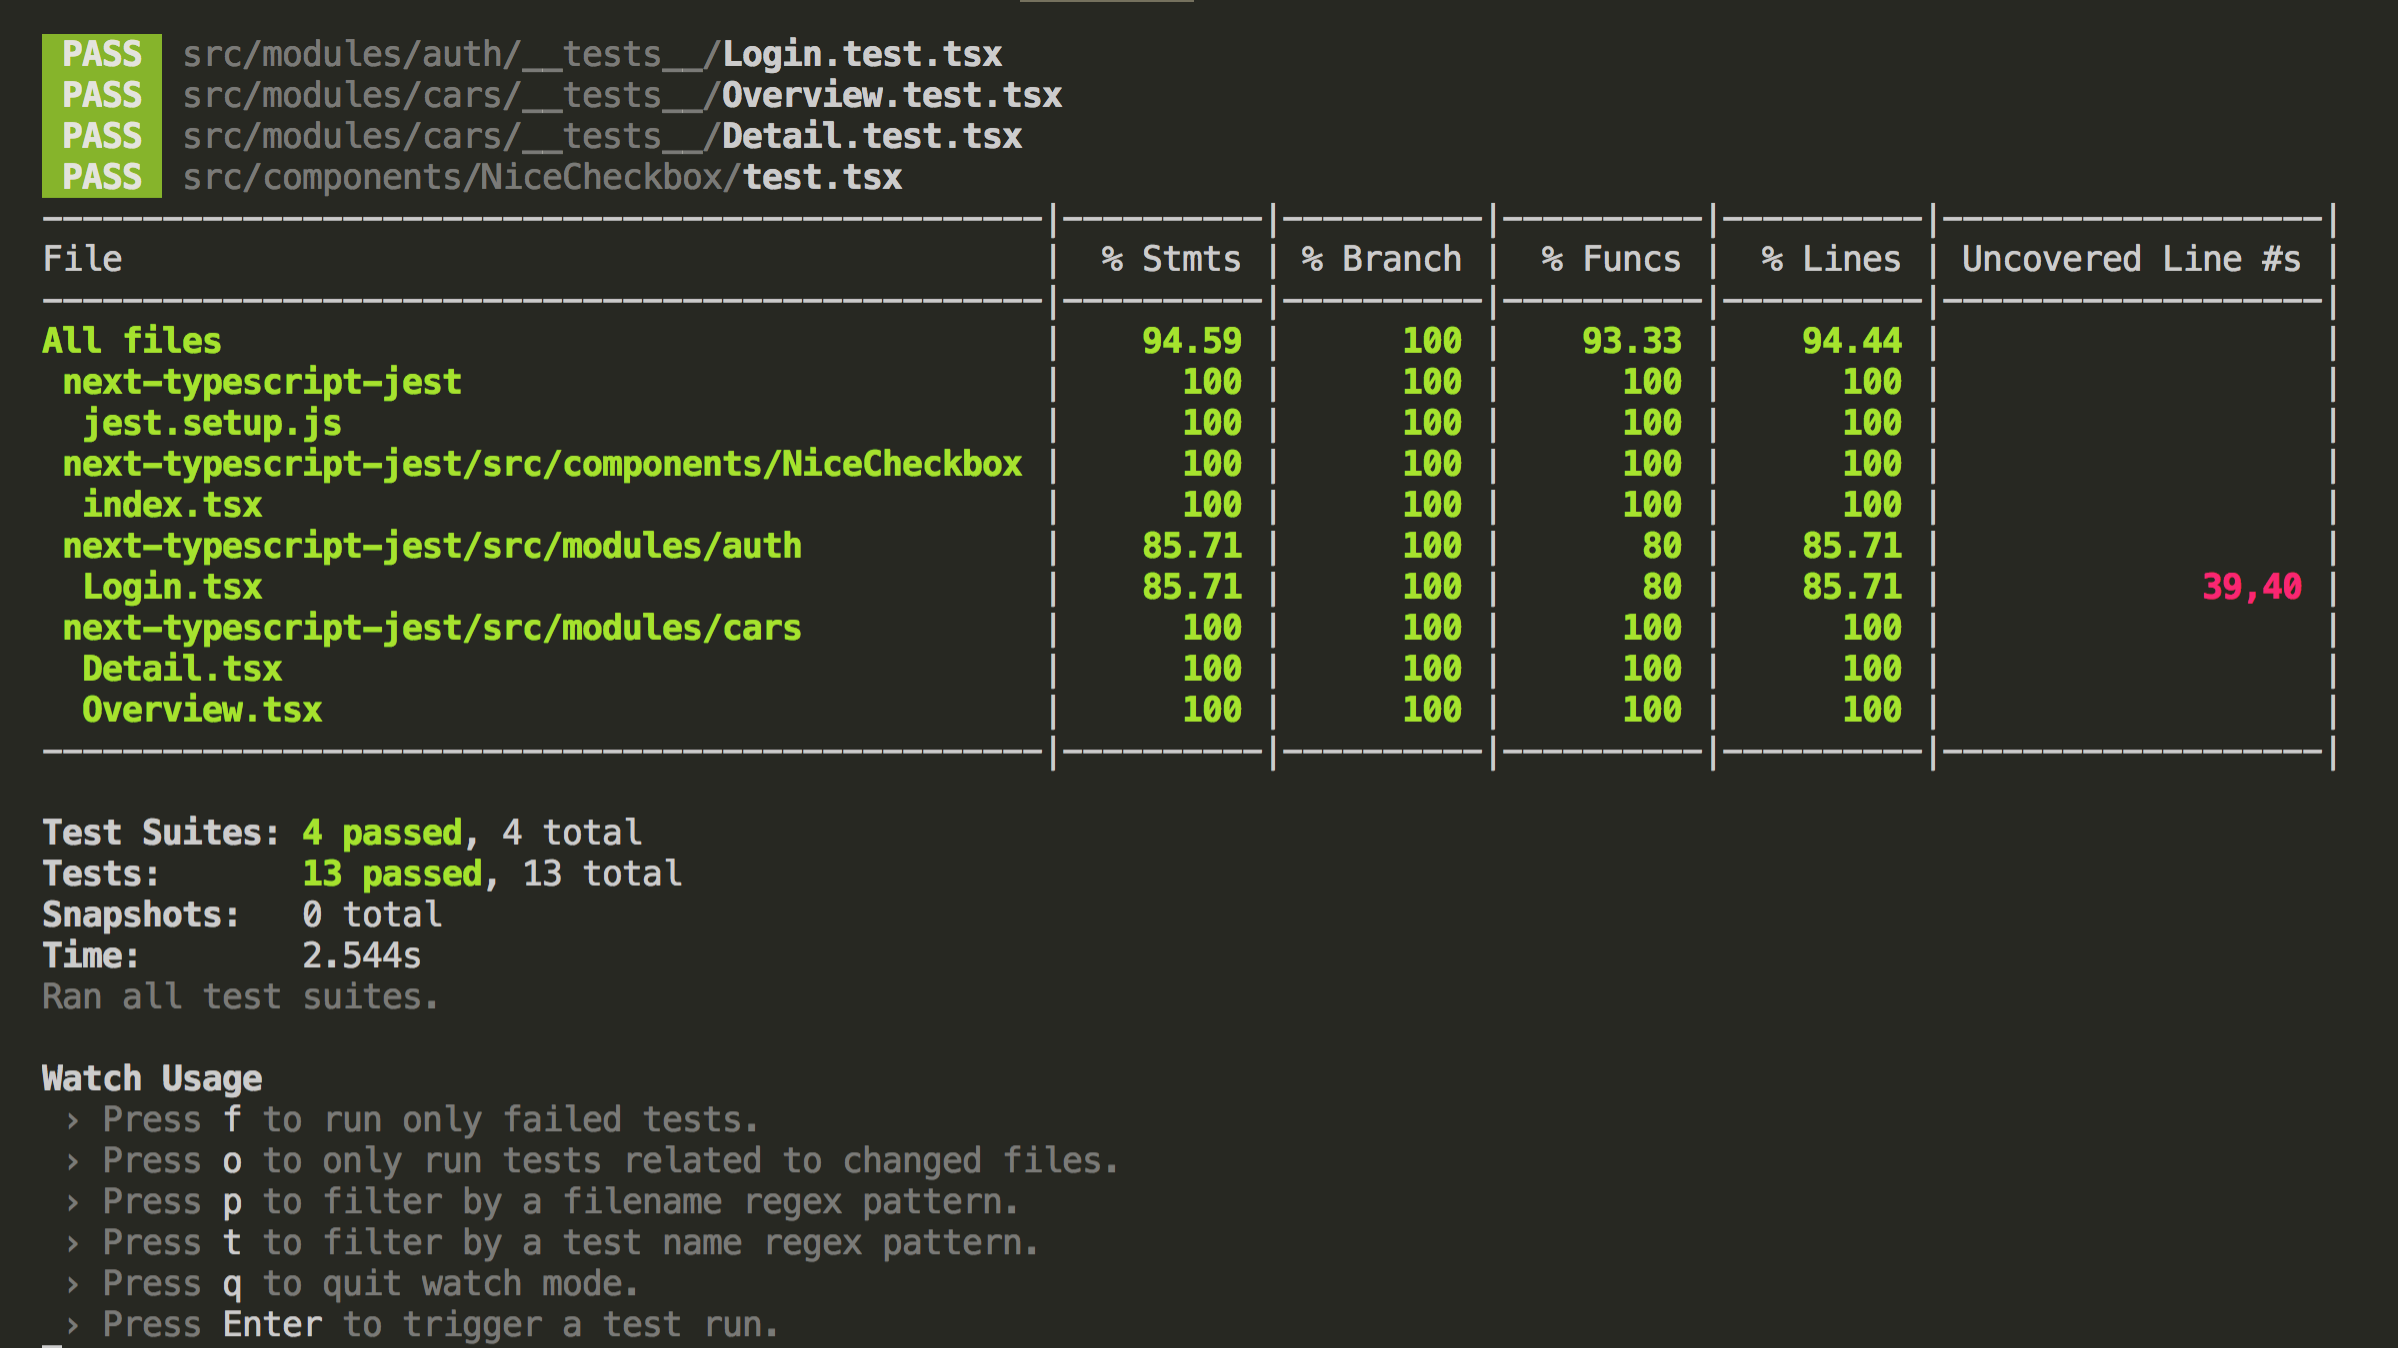
Since in this case the collectCoverage in jest.config.js is set to true the output of running the tests will be:

Conclusion
Having meaningful tests and good coverage should be a priority when building any kind of software product and I hope this post will help someone who found themselves stuck with trying to set up tests for a NextJS-TypeScript-Jest app.
The entire source of this sample app can be found at GitHub.
964 Words
2018-03-31 19:00 +0000